This post is part of our Home Science Lab series—your step-by-step guide to creating a fun, functional, and confidence-boosting lab at home. Don’t miss the rest of the series to build your science space with ease!
Start Slow, Think Long-Term
When I was first married, I realized I didn’t have any Christmas ornaments. Not a single one. We were students and didn’t have much money, and this was before Amazon and online shopping made it easy to grab a big box of decorations overnight.
I didn’t want to just buy a cheap set from Kmart, so instead, I made a plan. Every month, I’d go to a little Christmas store and pick out one special ornament—or a string of stars, or a tiny garland. I also started asking family and friends for Christmas decorations as gifts. After a couple of years, I had a beautiful collection that felt personal, thoughtful, and full of memories.
Setting up a home science lab works the same way.
One Focus at a Time
Building your collection of science supplies doesn’t need to happen all at once—in fact, it shouldn’t. The best approach is to start with one area of interest, invest in a few well-chosen tools, and use them deeply and creatively for as long as possible. Whether your child is drawn to chemistry, microscopy, human biology, dissections, or botany, there’s no need to cover it all at once.
Start with what excites them most.
Spend time exploring it.
Then grow from there.
Think Like a Collector, Not a Consumer
This is about long-term investment, not short-term overwhelm. Most science tools, if taken care of, last a lifetime. My microscope in my old medical office was older than me—and it still worked beautifully.
Here are a few tips I often share with families:
- Look for secondhand science tools on Facebook Marketplace or local homeschool groups. Kids eventually grow up and leave for college and their parents are usually happy to have the space for something else.
- Prioritize quality where it counts. A solid microscope or good dissection instruments (tools) can be used for years or even decades.
- Take your time. Just like my box of Christmas ornaments, your science lab will grow, piece by piece.
- Learn to use each piece. One benefit of collecting your gear slowly is that you can focus on learning as much as possible about each item rather than having a lot of things your kids never use.
We’ll explore different areas of science in the next couple week but here’s the first area we’ll discuss:
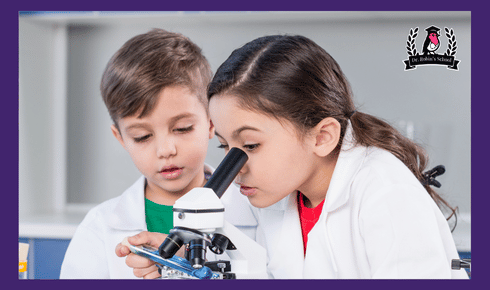
Microscopy: A Window into Hidden Worlds
Microscopy is a rewarding and surprisingly affordable way to explore science at home. It opens up a whole new world of cells, fibers, tiny organisms, textures, and materials that are invisible to the naked eye.
If your child is curious about what things look like up close, microscopy is a great place to start. Sometimes parents aren’t sure if their child is interested. In that case, start with a microscope that clips on your phone as that’s the easiest way to start. Get some water from the gutter or a pond or look at onion cells. And see what happens!
Here are a few options, depending on your budget and your child’s age:
Microscope Options
- Foldscope: A low-cost, foldable paper microscope developed by scientists. Durable, portable, and surprisingly powerful.
- Handheld microscope: Easy for younger kids to use. Great for nature walks or examining everyday objects.
- Phone clip-on microscope: Turns your smartphone camera into a microscope. Excellent for digital observation or photo journaling. Also the easiest to start using immediately, so it is a great option if you aren’t sure if your child’s interest will continue.
- Compound microscope: The classic choice. A solid investment if your child is serious about biology or already showing strong interest. Many last for decades with proper care.
Want help choosing the right microscope for your family? You can check out the previous blog post about it!
Helpful Microscopy Tools
To get the most out of any microscope, here are a few must-haves:
- Slides and slip covers – Essential for mounting specimens. Buy a small box to start.
- Tweezers – For placing and adjusting delicate samples.
- Disposable pipettes – Useful for collecting small amounts of water or liquids.
- Cotton swabs – Great for gathering cheek cells, plant material, or plumbing gunk.
- Collection containers – We love old medicine bottles for dry samples, and washed-out jam or peanut butter jars (with leak-tested lids!) for water specimens.
Up next on the blog: We’ll share our favorite budget-friendly gear for exploring other types of science!