
This post is part of our Home Science Lab series, your step-by-step guide to creating a fun, functional, and confidence-boosting lab at home. Don’t miss the rest of the series to build your science space with ease! The first several articles cover getting started. Then we’ll move into tools and techniques, organization and safety, and routines and practices.
Every Home Has Room for Science
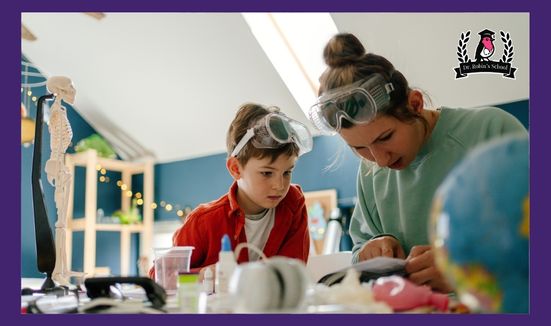
No extra room? No problem. The best home labs aren’t necessarily big—they’re thoughtfully chosen, safe, and easy to use. Whether you’re homeschooling full-time or just want to nurture curiosity after school, the key is to create a space where your learner feels confident and ready to explore.
You don’t need a whole room. You just need a space that meets some basic criteria.
What to Look For in a Lab Space
Here are five things to consider when choosing your science spot:
1. A clear surface
Science is hands-on. Choose a table, desk, or counter with enough room to spread out materials and write in a notebook. If it’s not easily wiped down, make sure to have a plan. Cookie sheets, old worn out table cloths, or cheap plastic shower curtains can all be used to protect the surface.
2. Good lighting
Natural light is ideal, but a simple lamp works too—especially for detailed tasks like drawing observations or using a microscope. Even a cheap clip on light from the hardware store can provide good lighting.
3. Ventilation and easy cleanup
Kitchen counters or laundry room tables work well because they’re easy to wipe down. Avoid carpeted areas for anything that might spill. If you have no choice, taking an old cardboard box and opening it out to cover the floor can really help! My sister rents an apartment and she puts down a tarp on the floor and then a flattened cardboard box over that and then does art or science with kids while sitting on the floor. The combination has kept the carpet clean!
4. Storage nearby
A few plastic bins or a rolling cart can make cleanup easy and keep your tools in reach. (We’ll dive deeper into storage in an upcoming post.)
5. Minimal distractions
Choose a space where focus is possible, even for short bursts of time. If that’s hard to find, try a “pop-up lab” that you set up and take down easily.
From Dr. Robin’s Home Lab
My husband, two teens, and I live in a 950 square foot bungalow built in 1920. It’s full of charm and character, and I absolutely love it—but it doesn’t have a lot of extra space.
So here’s what I do.
I use a cheap plastic shower curtain from the dollar store and tape it over our dining room table to protect the surface during experiments. I don’t tape it directly to the table–I fold it around the corners of the table and then tape it to itself. It works beautifully, and cleanup is a breeze. For storage, I have a little metal wheelie cart from IKEA that holds our core supplies, and we keep larger items tucked away in one of the cupboards of our beautiful old china cabinet.
It’s not a fancy lab. It’s a lived-in home—and it works.
A Few More Tips for Mess Containment
The top thing I dislike about science (or art for that matter!) is the mess it makes! It seems like it takes five minutes to make a mess that will be an hour of clean-up. This is a summary of what I’ve learned over the years:
- Use a cookie sheet or lunch tray that can go in with the dishes. I have several old flat cafeteria trays my husband grabbed from the dumpster at a school where he worked years ago. And from when my kids were little, I kept a couple of those children’s lunch trays with different spots for drink, entrée, and side dish. I also have various cookie sheets and brownie pans in my kitchen. My kids have learned from a young age that every art or science project goes on a tray of some sort. This keeps the mess contained and afterwards it can go through the dishwasher or be hand washed with the dishes.
- Cover surfaces with whatever works best and is handy. I have some old stained/torn tablecloths and a couple cheap shower curtains to protect surfaces. The shower curtain can just get hosed off in the bathtub and hung to dry there and the tablecloths can go through the laundry. I’ll also cut open a shipping box that came in the mail and use it flattened to protect a surface.
- Wearing gloves helps, too. We have always had gloves in the kids’ sizes even when they were little. Our Costco sold gloves in the pharmacy area that went down to size extra small. Now they both have hands bigger than mine! Teach your kids how to take off their gloves the way doctors and nurses do–there are lots of videos on YouTube like this one.
- Dispose of sharps properly. Anything sharp and any glass (like slides) should be removed from your work area first. I teach my students and kids that a medical professional is always responsible for their own sharps to ensure no one else gets hurt. This is true in hospitals and is true in homes.
- Have a sink of hot soapy water ready. This isn’t always necessary, but if you have been dissecting or doing something else that needs a good cleaning, you can remove everything directly to the hot soapy water. Have a strainer or colander to hold all the small stuff so you aren’t fishing around in the bottom of the sink. Remove everything that needs to be washed directly from your work surface to the sink.
- Have an easy way to put away everything else. Bins, baskets, carts, and cupboards are all fine options. Do what works best for your family. I am a ladybug (organizing style) so for me, open baskets inside a cupboard is the best. But my younger child is a butterfly so we also have two open carts, one for science and one for art. Things we use frequently go in the carts and less-used or larger supplies go in the baskets in the cupboard.
Real-Life Lab Spots That Work
Still not sure where to start? Here are a few tried-and-true setups that have worked for families around the world:
- A corner of the kitchen with a caddy of tools
- A child’s bedroom desk cleared for experiments
- A foldable table pulled out just for “lab time”
- A garage or balcony table used on weekends
- A rolling cart that turns any room into a lab
It doesn’t have to be perfect. It just has to be functional, flexible, and yours.